Hey Hey! It's been a while since I did a clothing DIY tutorial so I figured i'd share how I created my favorite pair of shorts! This was my first time bleaching anythinggggg and I actually used Likin&Loving It as a guide, but here are my steps!
Materials Needed:
Bleach - Clorox is what I used, it was strong and fast!
Jean Shorts - I thrifted a pair of vintage levi pants and cut them to the length I wanted.
Rubber Gloves - Super important since bleach is so yucky!
Bucket - Make sure It's big enough to contain your shorts!
Seam Ripper - If you want your shorts to be distressed, a seam ripper/knife is the best way to get frayed edges!
Painters Tape - Not required, but it was helpful to me to indicate where I wanted the bleach to begin
 Step 1: Before you begin, make sure you cut/rip/distress your shorts to your liking! I put the shorts on and marked exactly where I wanted all the rips, and frays, as well as the perfect place for the ombre to begin. Once I took them off, I used a seam ripper to make all my rips (it's better than scissors because the rip won't be so clean). I used Painters tape to indicate where I wanted my bleach to start!
TIP! If you're starting out with jeans, and turning them into shorts, Use scissors to begin cutting the leg, but rip them by hand after the initial snip! It'll help your ends fray and look more naturally distressed than cutting them all the way through.
Step 2: Fill your bucket with hot water. Mine wasn't boiling, though I hear that yields better results. Slap on your rubber gloves and pour about one cup of bleach into the water. The amount of bleach varies on how bleached you actually want your garment. As you can see, I wanted mine very contrasted, so I used a bit more bleach and let them sit for a bit longer than usual.
Step 3: Insert your shorts all the way up to your designated line. Let them sit in the bleach for until you get the desired bleach wash of the less intense part of the ombre. This part is very important, because you will be leaving the lower portion in for a longer amount of time to get the ombre effect so don't let them sit too long. Mine took about 10 minutes.

Step 4: Pull the shorts out of the bleach/water mixture so approximately half of your designated area is still left in the bleach (pictured above). Let that sit until you have the desired bleach on the bottom half. This should be the most intensely bleached part of your garment. I left this portion for about 10 minutes.
TIP! Do NOTTTT let the garmet sit in the mixture for more than approximately 30 minutes in total. Letting the garment sit in the bleach too long will result in the fabric falling apart once you put them in the washing machine, ruining your shorts!
Step 5: Remove your garment from the mixture and hand-wash WELL approximately 2 times. This stops the bleaching process completely.
Step 6: Run your garment through the washing machine 1 or 2 times, to get excess bleach out, remove the smell, and allow the shorts to fray properly. Dry.
And Voila! Here's my result! And they were absolutely perfect. I'm not sure what that little triangle thing is, but it looks snazzy ;)


Comment with questions and results, we want to see what you guys can come up with!
xo
Materials Needed:
Bleach - Clorox is what I used, it was strong and fast!
Jean Shorts - I thrifted a pair of vintage levi pants and cut them to the length I wanted.
Rubber Gloves - Super important since bleach is so yucky!
Bucket - Make sure It's big enough to contain your shorts!
Seam Ripper - If you want your shorts to be distressed, a seam ripper/knife is the best way to get frayed edges!
Painters Tape - Not required, but it was helpful to me to indicate where I wanted the bleach to begin

TIP! If you're starting out with jeans, and turning them into shorts, Use scissors to begin cutting the leg, but rip them by hand after the initial snip! It'll help your ends fray and look more naturally distressed than cutting them all the way through.
Step 2: Fill your bucket with hot water. Mine wasn't boiling, though I hear that yields better results. Slap on your rubber gloves and pour about one cup of bleach into the water. The amount of bleach varies on how bleached you actually want your garment. As you can see, I wanted mine very contrasted, so I used a bit more bleach and let them sit for a bit longer than usual.
Step 3: Insert your shorts all the way up to your designated line. Let them sit in the bleach for until you get the desired bleach wash of the less intense part of the ombre. This part is very important, because you will be leaving the lower portion in for a longer amount of time to get the ombre effect so don't let them sit too long. Mine took about 10 minutes.

Step 4: Pull the shorts out of the bleach/water mixture so approximately half of your designated area is still left in the bleach (pictured above). Let that sit until you have the desired bleach on the bottom half. This should be the most intensely bleached part of your garment. I left this portion for about 10 minutes.
TIP! Do NOTTTT let the garmet sit in the mixture for more than approximately 30 minutes in total. Letting the garment sit in the bleach too long will result in the fabric falling apart once you put them in the washing machine, ruining your shorts!
Step 5: Remove your garment from the mixture and hand-wash WELL approximately 2 times. This stops the bleaching process completely.
Step 6: Run your garment through the washing machine 1 or 2 times, to get excess bleach out, remove the smell, and allow the shorts to fray properly. Dry.
And Voila! Here's my result! And they were absolutely perfect. I'm not sure what that little triangle thing is, but it looks snazzy ;)
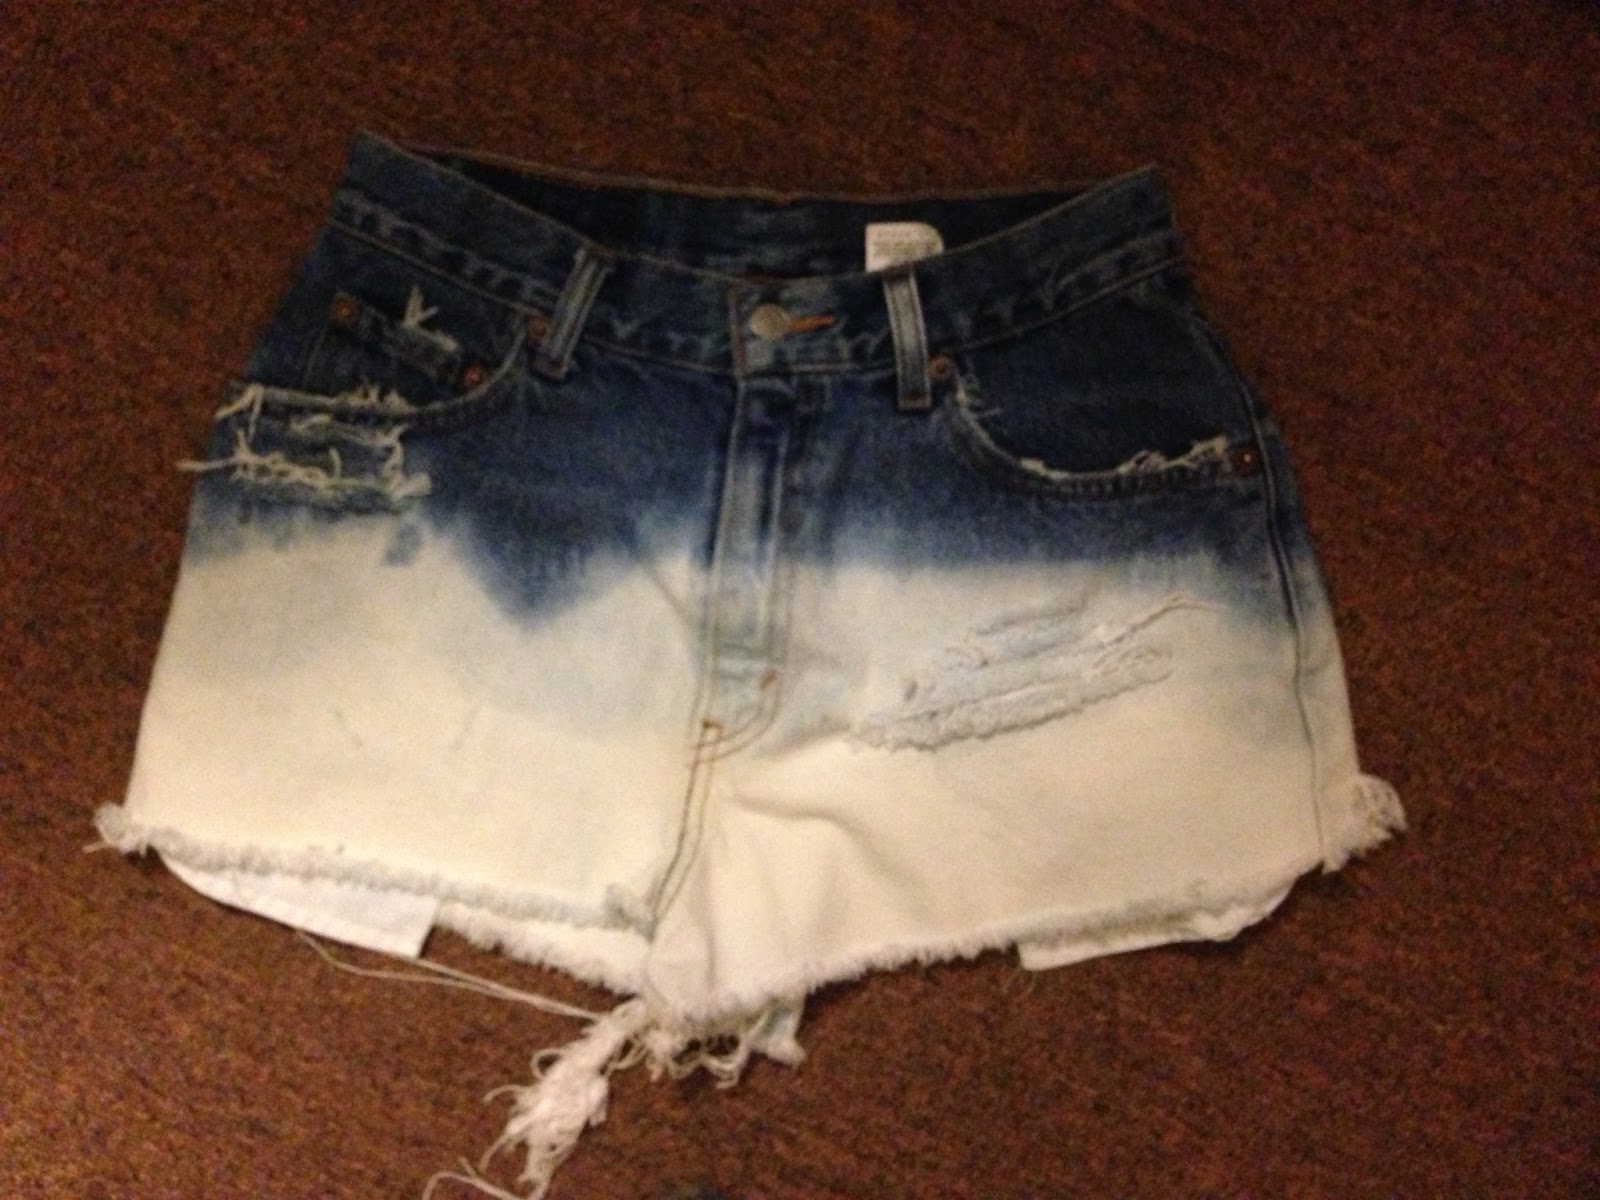

Comment with questions and results, we want to see what you guys can come up with!
xo


.JPG)


 Posts
Posts

